
What a Grisha Remnant does
A Grisha Remnant is a personal item built around summoning a Grisha. The current player-produced reference describes an active summon and a passive chance to call a Grisha when a melee attack lands. Additional pickups improve that package: the first documented level grants one summon and a 2% passive trigger chance; the second adds another summon per rest and raises the reported chance to 4%; the third makes summoned damage scale with the remnants held. Source 1Community report of eight Grisha Remnant locationsOpen source
Those values are useful for checking the item screen, but they are not an official database. Read the active and passive text on the installed build before spending a route around a particular percentage. The Week 1 Update strengthened the Grisha personal-item active, fixed its passive spawning, and removed enemy-style attack warnings from the summon. It also fixed a Grisha that respawned indefinitely in one dungeon. Source 3The Week 1 UpdateOpen source Any guide that depends on that infinite respawn now describes an obsolete build.
Eight verified Grisha Remnant encounters
The route below follows the cited eight-location guide. It is a practical cleanup path, not a claim that only eight remnants can exist on a save. The original community thread includes players reporting more than eight, which may reflect additional encounters, repeatable sources, New Game Plus, or a later discovery. Source 1Community report of eight Grisha Remnant locationsOpen source Treat each row as a known destination and compare the pickup state with your own inventory.
| Route | Start or region anchor | Encounter destination | What to record |
|---|---|---|---|
| 1 | Widow's Overlook Beacon | Flooded Village arena reached through the large building and elevator | Elevator used, arena cleared, item count |
| 2 | Gloomshade Grove Beacon | Grisha found a short distance to the left of the Beacon route | Beacon screenshot and pickup count |
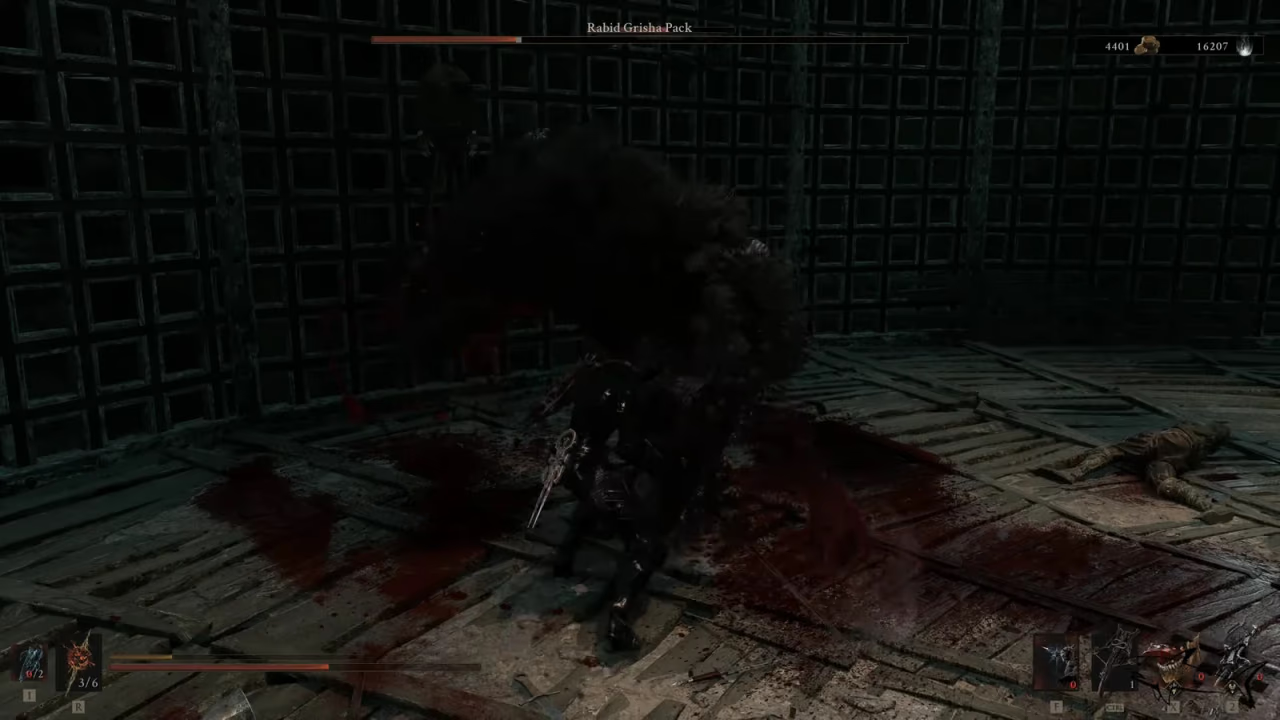
| 3–4 | Blackridge Pass Beacon | Rabid Grisha Pack at the bottom of the Holding Cells dungeon | Both enemies defeated and both rewards checked |
| 5 | One Legged Wolf Beacon | Pale Grisha in the Grisha Hunting Grounds dungeon | Cave entrance, elevator, pickup count |
| 6 | Cleansed Gate | Mornefrost Grave route leading toward Winterglass Lake | Immaculate Crown obtained and gate opened |
| 7 | Corrupted Gate | Withered Shoals Gate route and its Grisha arena | Gate crossed and arena cleared |
| 8 | Marrow Keep Beacon | Hidden Desolate Keep route behind the four-chain mechanism | Secret route opened and post-fight inventory count |
The detailed route source places the first encounter north of Widow's Overlook. Continue past Gorf and the Shrine of Trials, enter the large structure through the available gate, ride down to the Flooded Village, then follow the downhill ramp and river torches. Source 2Patch Crazy eight-location Grisha Remnant routeOpen source The Gloomshade Grove encounter is much shorter: leave from that Beacon and check the nearby left-hand route before turning it into a long regional search.
The Holding Cells entry matters because the Rabid Grisha Pack accounts for two encounters in one arena. From Blackridge Pass, travel southeast toward Blackridge Hamlet and use the well entrance. Keep to the right after descending into the sewers until the arena door appears. Record both rewards before checking off rows three and four; writing only “Holding Cells complete” can hide a missed pickup.
For the fifth route, travel northwest from One Legged Wolf Beacon, use the red tree as the turn marker, and continue through the ruins to the Grisha Hunting Grounds cave. Inside, keep left to reach the elevator and then use the right-hand path to the Pale Grisha. Source 2Patch Crazy eight-location Grisha Remnant routeOpen source This is a better note than an unlabeled arena screenshot because the ruins and cave entrance identify the route on a later cleanup pass.
The Mornefrost route requires more state tracking. Starting at Cleansed Gate, enter Mornefrost Grave, work along the right-hand route, and collect the Immaculate Crown used to expose secrets in the ice. The documented path then uses the gate control to reach the Grisha near Winterglass Lake. Do not check this row merely because the crown is in the inventory; confirm the fight and resulting remnant count separately.
The seventh destination begins at a Corrupted Gate and continues down the right-hand stairs toward Withered Shoals Gate. The eighth begins at Marrow Keep and uses the hidden-dungeon access near the Slayer Seal altar. The route guide warns that equipping the Slayer Seal affects trophies; picking it up for access is different from activating its gameplay effect. From the altar, find the chained circular mechanism, break the four chains, and proceed into Desolate Keep. Source 2Patch Crazy eight-location Grisha Remnant routeOpen source
A checklist that survives patches
Use the nearest Beacon, destination, item count before the fight, and item count after the fight. A binary “defeated” box is not enough when a multi-enemy encounter or a repeated source is involved.
| Route | Reached | Fight cleared | Count increased | Screenshot saved |
|---|---|---|---|---|
| 1 | ☐ | ☐ | ☐ | ☐ |
| 2 | ☐ | ☐ | ☐ | ☐ |
| 3–4 | ☐ | ☐ | ☐ | ☐ |
| 5 | ☐ | ☐ | ☐ | ☐ |
| 6 | ☐ | ☐ | ☐ | ☐ |
| 7 | ☐ | ☐ | ☐ | ☐ |
| 8 | ☐ | ☐ | ☐ | ☐ |
Take the screenshot before leaving the arena and include a landmark or map position. Similar cave and dungeon rooms are difficult to distinguish after several hours. If the item count did not change, rest once, re-open the personal-item screen, and verify that the enemy was the Grisha associated with the route rather than a different creature using a similar arena.
Fight preparation and summon use
Spend carried Gloom before a long attempt, clear nearby ordinary enemies, and identify the run-back before entering the arena. Grisha attacks punish late panic dodges, so use the first attempt to identify reach and recovery rather than forcing a quick kill. If an arena contains two Grishas, separate their pressure instead of locking the camera into a corner.
The summon is most useful when it creates space, interrupts ordinary enemies, or divides attention in a crowded fight. It should not replace a safe plan for bosses or enemies whose movement can leave the summon attacking empty ground. After the Week 1 changes, retest the active and passive on a repeatable ordinary group; that shows whether an older build recommendation still applies without risking a boss attempt.
Troubleshooting a missing encounter or pickup
First compare the installed patch with the guide date. Then return from the named Beacon rather than approaching from an improvised direction. Some encounters depend on a dungeon state, gate, or item such as the Immaculate Crown. If the expected Grisha does not appear, rest, reload the area, and confirm that the fight was not already cleared on that save.
Do not assume a missing spawn proves the route is wrong. The cited community thread includes a report of being at a location without a spawn, and the Week 1 Update changed Grisha spawning behavior. Source 1Community report of eight Grisha Remnant locationsOpen source Preserve the save, document the route and patch, and use the private correction form if the same mismatch survives a reload. That evidence is more useful than repeating an old farming loop.
Use the map workflow to mark Beacon-to-arena paths and the boss hub for a reusable preparation loop. This route and the post-patch warning were checked on September 3, 2026.
What to record after each Grisha
For a dependable cleanup log, record the nearest Beacon, the direction traveled, the arena landmark, whether a gate or dungeon state was required, the personal-item count before and after, and the installed patch. Number the entries by route order rather than inventing an official in-game numbering system. If a ninth encounter appears, keep it separate until the enemy, reward, and location can be reproduced. This method preserves useful evidence without turning the currently documented eight-location route into an unsupported hard cap.

